Snapshots#
Snapshot feature: available only for SaaS Pro & self-hosted Konfuzio users
If you want to setup the Snapshot feature for self-hosted installation please refer to dev.konfuzio.com.
Welcome to the Konfuzio Snapshot feature documentation. Snapshots are a powerful tool for managing your projects and data. In this guide, we’ll walk you through what Snapshots are and how to use them effectively.
What is a Konfuzio Snapshot?#
A Konfuzio “Snapshot” is a saved state of your Project at a specific point in time. Think of it as a backup that allows you to secure or transfer data between projects or installations. With Snapshots, you can quickly recreate a Project’s setup without starting from scratch.
Snapshot modes:#
Konfuzio offers two Snapshot modes, which you can use individually or in combination. Those modes allow to finetune which Documents and AIs are included in the Snapshot.
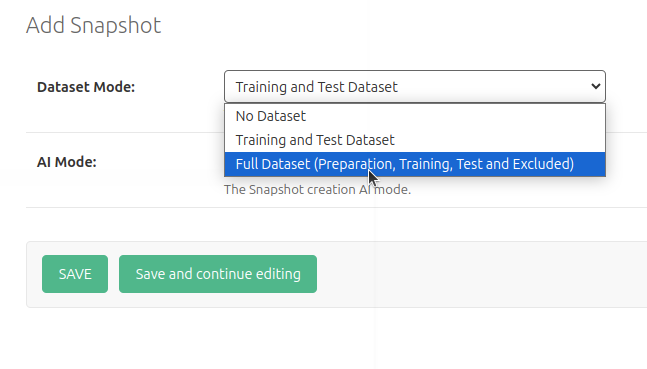
Dataset Mode#
Selecting Dataset mode |
|---|
|
Contents |
Included |
Not included |
|---|---|---|
Documents |
See dropdown |
|
Categories |
All |
- |
Labels |
All |
- |
Label Sets |
All |
- |
Annotations |
All |
- |
Annotation Sets |
All |
- |
Members |
- |
Members are not included in the Snapshot |
AIs |
- |
AIs are not included in the Snapshot |
All properties of the included values (like name, description, etc) are included 1:1 in the Snapshot.
Use Dataset Mode to save the Documents you need. This is handy for creating a snapshot of a stable Project, especially when you’ve invested time in creating Annotations and categorizing Documents.
AI Mode#
Selecting AI mode |
|---|
|
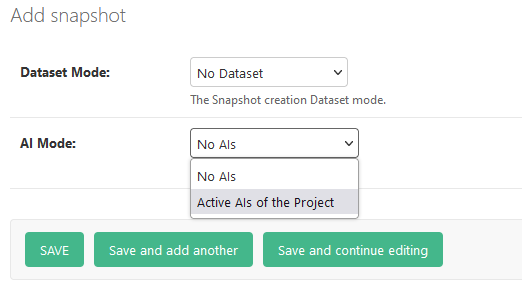
AI Mode allows you to save all your active AI models. This mode is perfect when you want to export a Project’s AI
capabilities, without including its Documents. New Projects created from a Snapshot can utilize its AI models
without needing any of its Training or Test Documents.
Contents |
Included |
Not included |
|---|---|---|
Documents |
- |
Documents are not included in the Snapshot |
Categories |
All |
- |
Labels |
All |
- |
Label Sets |
All |
- |
Annotations |
- |
Annotations are not included in the Snapshot |
Annotation Sets |
- |
Annotations Sets are not included in the Snapshot |
Members |
- |
Members are not included in the Snapshot |
AIs |
Trained & Active AIs |
Non-active & not fully trained AIs |
All properties of the included values (like name, description, etc) are included 1:1 in the Snapshot.
Existing AI evaluations are not included in the Snapshot.
AI Type support within the Snapshot#
Extraction, Splitting & Categorization AI types are supported for the Snapshot. The only AI which will
not automatically appear after a Snapshot has been restored, is the name-based Categorization AI. This AI can be
recreated, by uploading a single Document to a Snapshot restored Project, while no other Categorization AI is active.
Bundling or Combining Modes#
Combining modes |
|---|
|
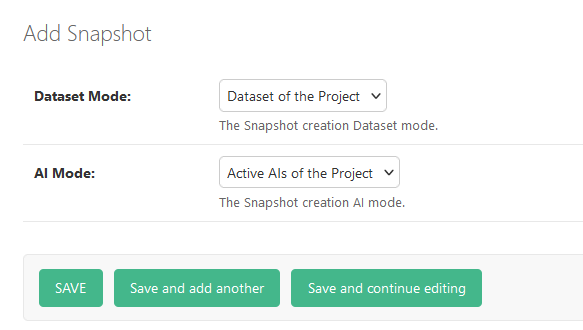
It is possible to combine modes and have a more comprehensive snapshot. This mode then includes all the values in either Snapshot mode, except those which are mutually excluded in each mode. By creating a combined/bundled Snapshot, you will have created a save-point, or backup of your entire Project (with the exception of mutually excluded values).
Creating a Snapshot#
To create a Snapshot, you can follow the steps below, which are the same for both app.konfuzio.com and self-hosted
installations.
Navigate to the Snapshot section in Konfuzio, located on the left sidebar under
DATA > Snapshots.Click the “ADD SNAPSHOT” button and choose one or both modes.
After selecting the mode(s), click “Save” to trigger the Snapshot creation process. The time it takes to create a Snapshot depends on your Project’s size and the selected mode. Once completed, the Snapshot’s status will display as “Snapshot created.”
Restoring a Snapshot#
Restoring or merging a Snapshot into an existing Project
For SaaS pro users it is only possible to restore Snapshots into a new Project. However, if you have a self-hosted installation, you can merge a snapshot into an existing Project. More information about this here
After creating a Snapshot, within the same environment (on app.konfuzio for example) into a new Project at any time.
Navigate to the Snapshot section in Konfuzio.
Select the Snapshot you want to restore from the list with the status “Snapshot created.”
Choose the “Snapshot restore into a new Project” option from the dropdown menu.
The restoration process will now start. How long this takes, is dependent on the Snapshot size.
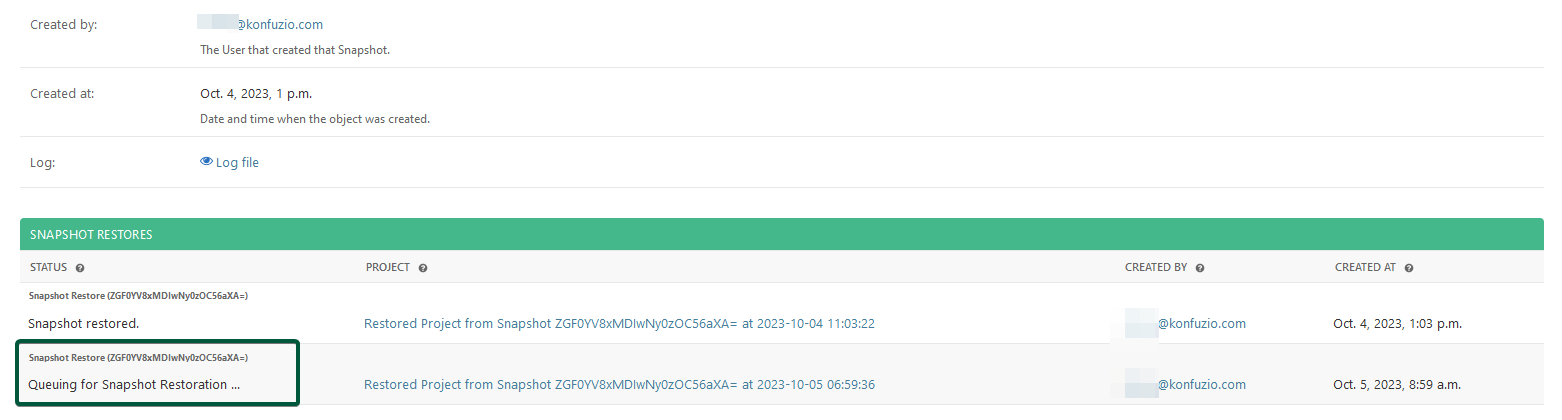
Snapshot restoration Status#
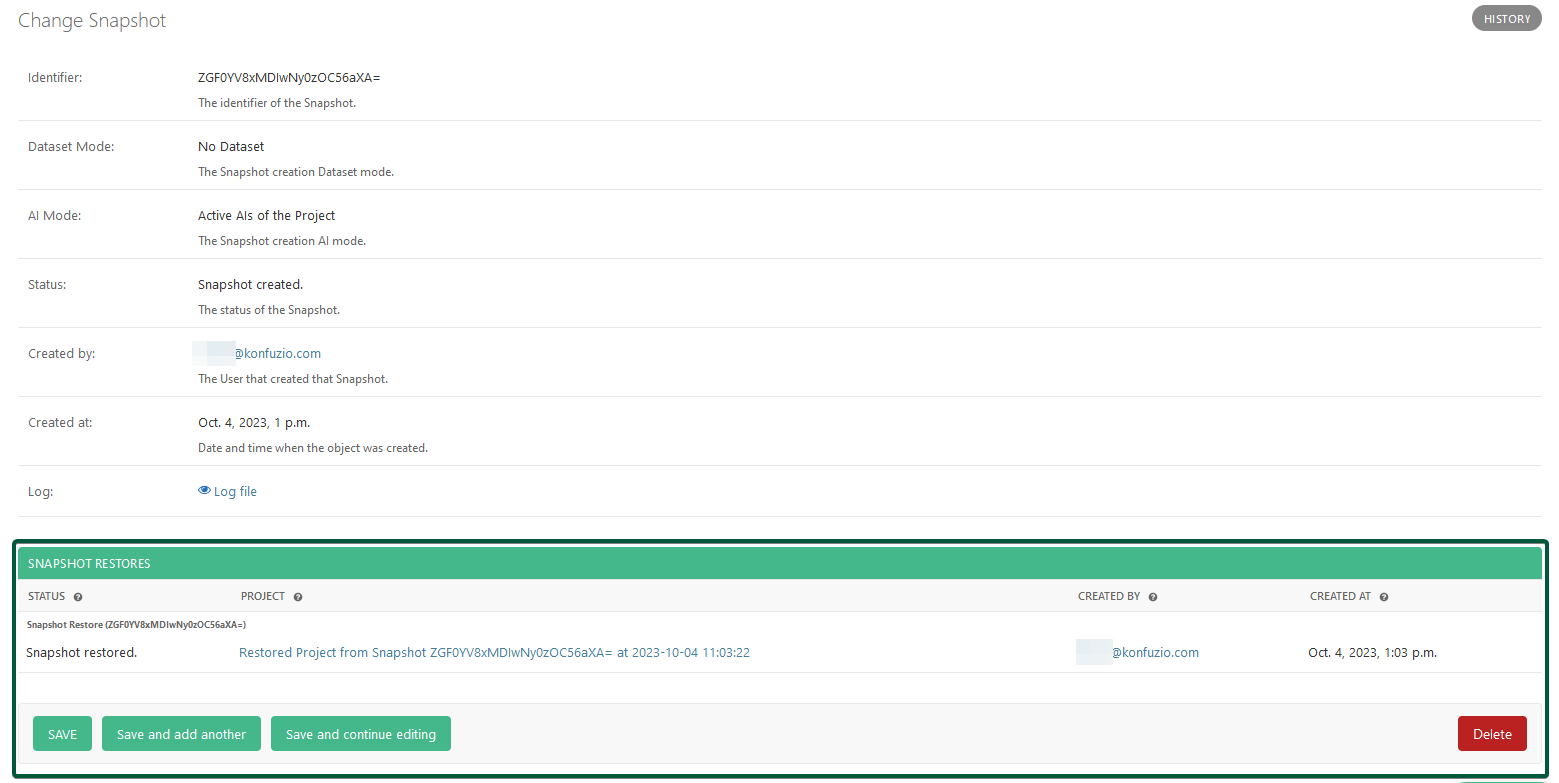
Once your Snapshot restoration starts, it will cycle through 1 of 4 possible statuses, which can be viewed on the Snapshot itself, below “Snapshot Restores”.
Queuing for Snapshot Restoration ...: Your Snapshot restore has just been initiated.Snapshot Restoration in progress...: Migration of data restoration has started.Snapshot restored.: Your Snapshot has been successfully restored.Contact support.: An error or failure occurred during restoration.
While you do immediately have access to your Snapshot restored Project, you will not see any Snapshot restored items
within your Project, until the status of Snapshot restored. has been reached.
Locating a Snapshot#
After restoring the Snapshot, it will be named using the Snapshot’s timestamp and the word “Snapshot.” It will look
somewhat like this: Restored Project from Snapshot ZGF0YV8xMDIwNy0zOC56aXA= at 2023-10-04 11:03:22. This Project can
be renamed at any time, at your own convenience.
You can also locate the restored Project, by going to the originating Project, of which the Snapshot was created, and selecting the Snapshot. Within the Snapshot, you will find a list of Snapshot restorations. By clicking on the restored Snapshot, you will be redirected to the Snapshots
Changing a Snapshot#
It is not possible to change the contents of a Snapshot once the Snapshot has been created. If you do want to change the Snapshot, it is advised to recreate the Snapshot while deleting the previous one.
Deleting a Snapshots#
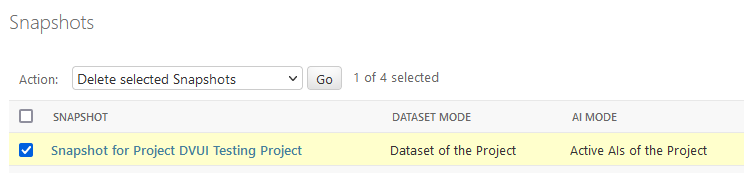
You can delete a Snapshot and its accompanied data by selecting the Snapshot in the Snapshot List view, and executing the action of “Delete selected Snapshot”. This will then irrevocably delete the Snapshot and all its data. Please do keep in mind, that this will not delete any data in Projects which were already restored by the Snapshot, or the Project of which the Snapshot was deleted.
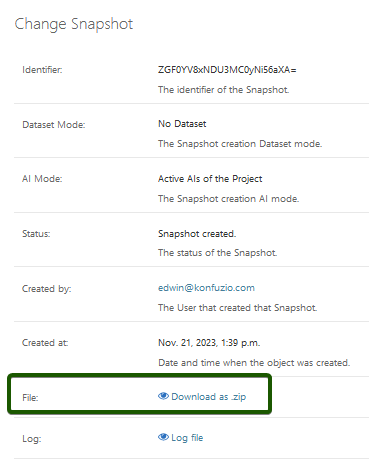
Downloading a Snapshot#
Downloading Snapshots is currently supported in two ways. The first way is by clicking on the button “Download as .zip” on the Snapshot itself. This will download the Snapshot as a .zip file to your local machine.
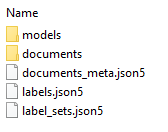
Location of the .zip Download |
Folder structure |
|---|---|
|
|
When you have a self-hosted installation it is also possible to download a Snapshots data by navigating to the
/data/konfuzio-snapshots/ folder through ssh. Here you will find the Snapshot as a .zip file, which can be
downloaded to your local machine.
Restoring a Snapshot from a .zip file#
Restoration of a Snapshot from a zip file
The Snapshot restoration from a .zip file is only possible for self-hosted installations.
Manually restoring a Snapshot from a .zip file can be done through a management command as follows:
Unzip the .zip file into the folder of the host where the Konfuzio Server is running. This will create a folder structure with the contents of the Snapshot.
Run the following command in your terminal, replacing the path to the folder and the name of the Project:
python manage.py project_import "/konfuzio-target-system/data_123/" "NewProjectName"
This command will restore the Snapshot into a new Project with the name “NewProjectName” from the contents of the
folder /konfuzio-target-system/data_123/. Further documentation on this command can be found
here here. The folder
structure will be the same as if downloaded from the user interface as a .zip file.
Snapshots for self-hosted installations#
This section provides specific details and considerations when working with Snapshots in a self-hosted environment.
Restoring a Snapshot Between different self-hosted installations#
Version cut-off date: Categorization AI in self-hosted Snapshot
Please keep in mind that only new versions of the Konfuzio Server currently support Categorization AIs in Snapshots.
If your self-hosted installation or your Categorization AIs trained on a self-hosted version below
released-2023-10-04_18-41-03, please read the following section
here
A Snapshot can be restored from a different environment/hosts, as long these environments/hosts are connected to a shared data storage (for example S3 or Azure). Restoring the Snapshot can then be done via the web-interface, where an Snapshot identifier from one environment, will ensure that it can be downloaded on another environment.
This can be useful, for example, when you have Konfuzio installations on different servers, such
as konfuzio-1.example.com and konfuzio-2.example.com.
Security information about the identifier
The unique identifier of a Snapshot, is only available within the shared storage that the host is connected to. So even if this identifier is leaked, any third party with access to the identifier, will not be able to restore the Snapshot, as long they are not connected to the same host, with their own Konfuzio installation as well.
Locating the Snapshot identifier on one environment (ex: |
|---|
|

Using the Snapshot identifier on another environment (ex: |
|---|
|

Prerequisites#
To restore Snapshots across environments, you need to configure your Konfuzio installations with the correct environment variables. These variables can be found in the dev documentation. For this tutorial, we assume the following:
SNAPSHOT_DEFAULT_FILE_STORAGEis set tostorages.backends.s3boto.S3BotoStorageorstorages.backends.azure_storage.AzureStorageBoth environments (
konfuzio-1.exampleandkonfuzio-2.example) are configured with the sameSNAPSHOT_DEFAULT_FILE_STORAGE.SNAPSHOT_RESTORE_ACROSS_ENVIRONMENTSis set toTrue.
Here’s an overview of the restoration process:
step-by-step: Restoring a Snapshot from One Environment to another through the web-interface#
Assuming that you’ve met the prerequisites, migrating Snapshots between environments is straightforward.
Get the Environment Identifier: On
konfuzio-1.example.com, go to the Snapshot that you previously created. In the Snapshots list view, you will find anidentifier. This identifier is all you need for the restoration.Use the Environment Identifier on the Other Environment: On
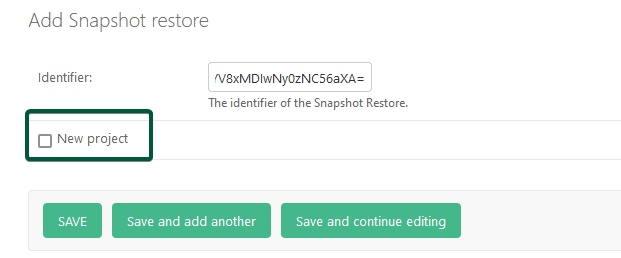
konfuzio-2.example.com, navigate to the Snapshot section and click on “Restores.” Please note that the “ Restores” section only appears ifSNAPSHOT_RESTORE_ACROSS_ENVIRONMENTSis set toTrue.Select How to Restore the Snapshot: Click on “Add Snapshot restore” and enter your identifier. Here, you can choose to either create a new project by checking “New Project” or import the Project and its Snapshot contents into your current Project.
Restoration Selection (New Project or Merging) |
|---|
|
Check the Status: Once you’ve chosen to import your Snapshot into a new or existing Project, the import process begins. You can monitor the status by clicking on the Snapshot restore itself. You can view the possible Snapshot restoration statuses here.
Snapshot Restoration Finished: Once the status of the Snapshot restoration changes to “Snapshot restored,” you can start using your Snapshot on the new environment.
That’s it! You’ve successfully restored a Snapshot from one Konfuzio environment to another. This feature is valuable for managing data and projects across multiple installations.
Manually restoring Snapshots on self-hosted installations#
Manually creating, restoring & migrating data with the SDK#
Without a shared data storage, the Snapshot feature is not needed
A state of a Project at a specific moment, only needs the Server and Konfuzio SDK CLi commands.
When working across different environments and hosts without shared storage, you can manually migrate data using the Konfuzio SDK and the Konfuzio Server with CLI commands. This method is particularly useful for air-gapped environments that don’t require the Snapshot feature. However, ensure you meet the version requirements for the Categorization AI, as described here.
For detailed instructions on restoring and migrating data with the Konfuzio SDK, please refer to our dev.konfuzio.com
Snapshots Permissions#
The Permission to create, read, update or delete a Permission must be assigned to a User via Roles. In order to use all Snapshot features you need to assign:
can view snapshot
can add snapshot
can change snapshot
can delete snapshot
can view snapshotrestore
can add snapshotrestore
can change snapshotrestore
can delete snapshotrestore
To learn more about Roles and Permission click here.