Reviewing the extracted information#
There can be different ways to access Documents in the Document Validation UI to review the information that was retrieved by the Extraction AI or to add information that wasn’t, depending on whether the application is hosted by our Konfuzio server, or it is integrated into a third-party application, using their server of choice.
Document Validation UI hosted by the Konfuzio server#
First, a Document will be assigned to you to review, and you will then receive an email informing you that you have a new Document to review, which will include:
A link to the assigned Document on the Konfuzio app.
A link to the current Document Validation UI Guide “Review Documents”, for guidance during the review process, if needed.
Document Validation UI integrated with a third-party application#
The Document which should be reviewed is accessed by the third-party application, which decides if it’s done by a link in an email or if it’s accessed directly from the application itself. How the Document Validation UI is integrated is completely up to the end user.
Available actions to review the Document data#
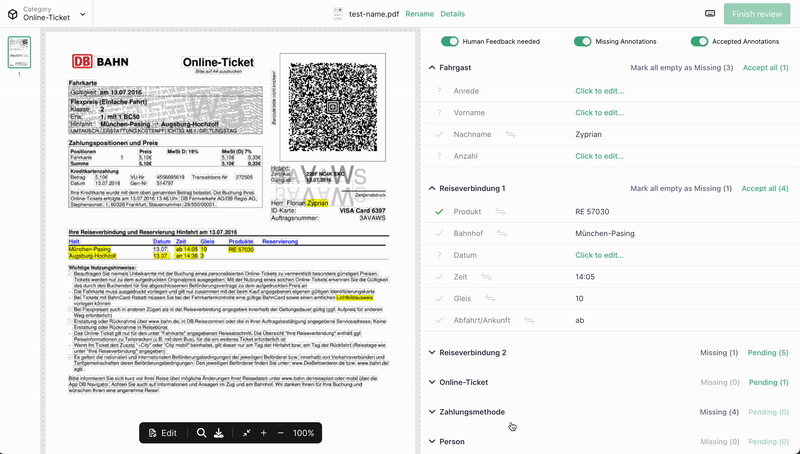
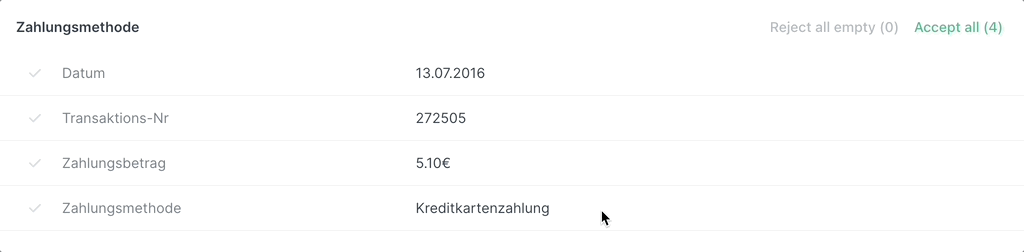
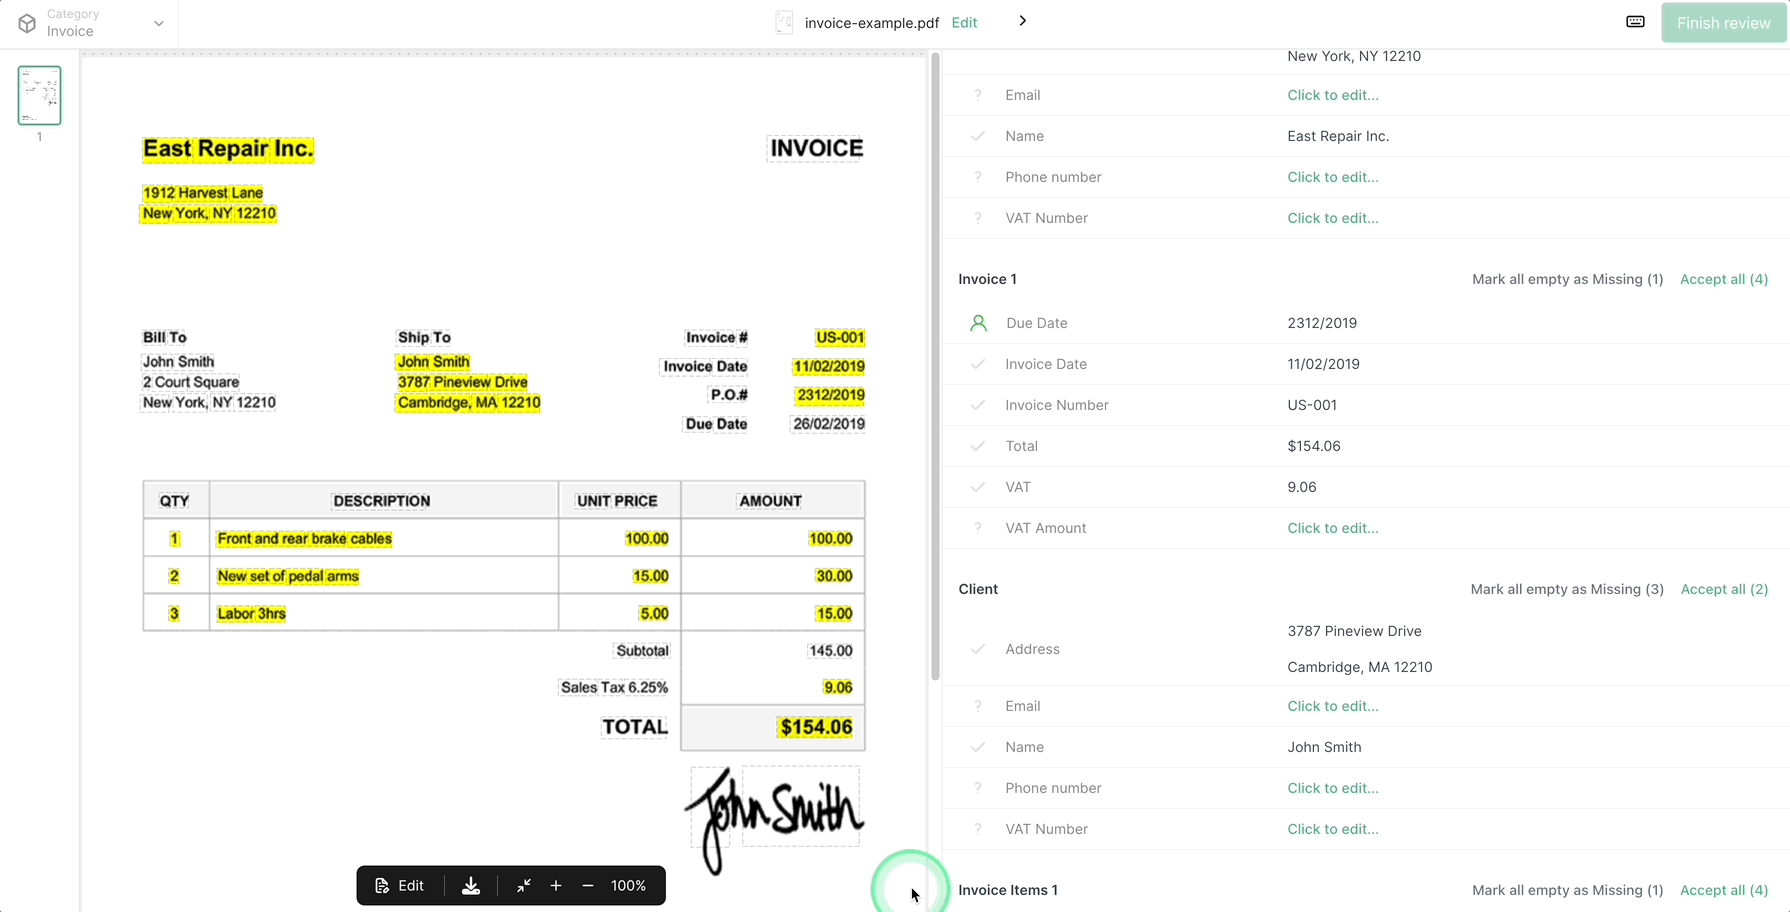
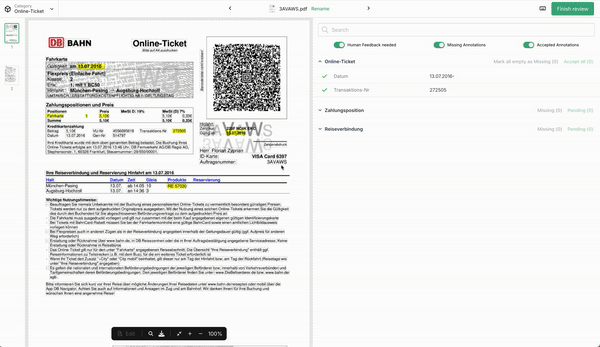
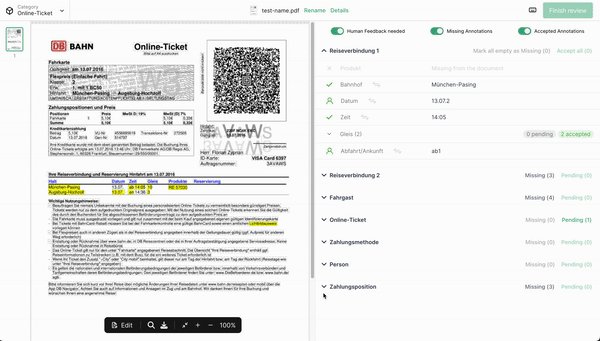
All the extracted data is organized accordingly within Annotation Sets, where each row presents the associated Labels along with their respective Annotations, if present.
During the review process, you will have the opportunity to provide feedback on these results.
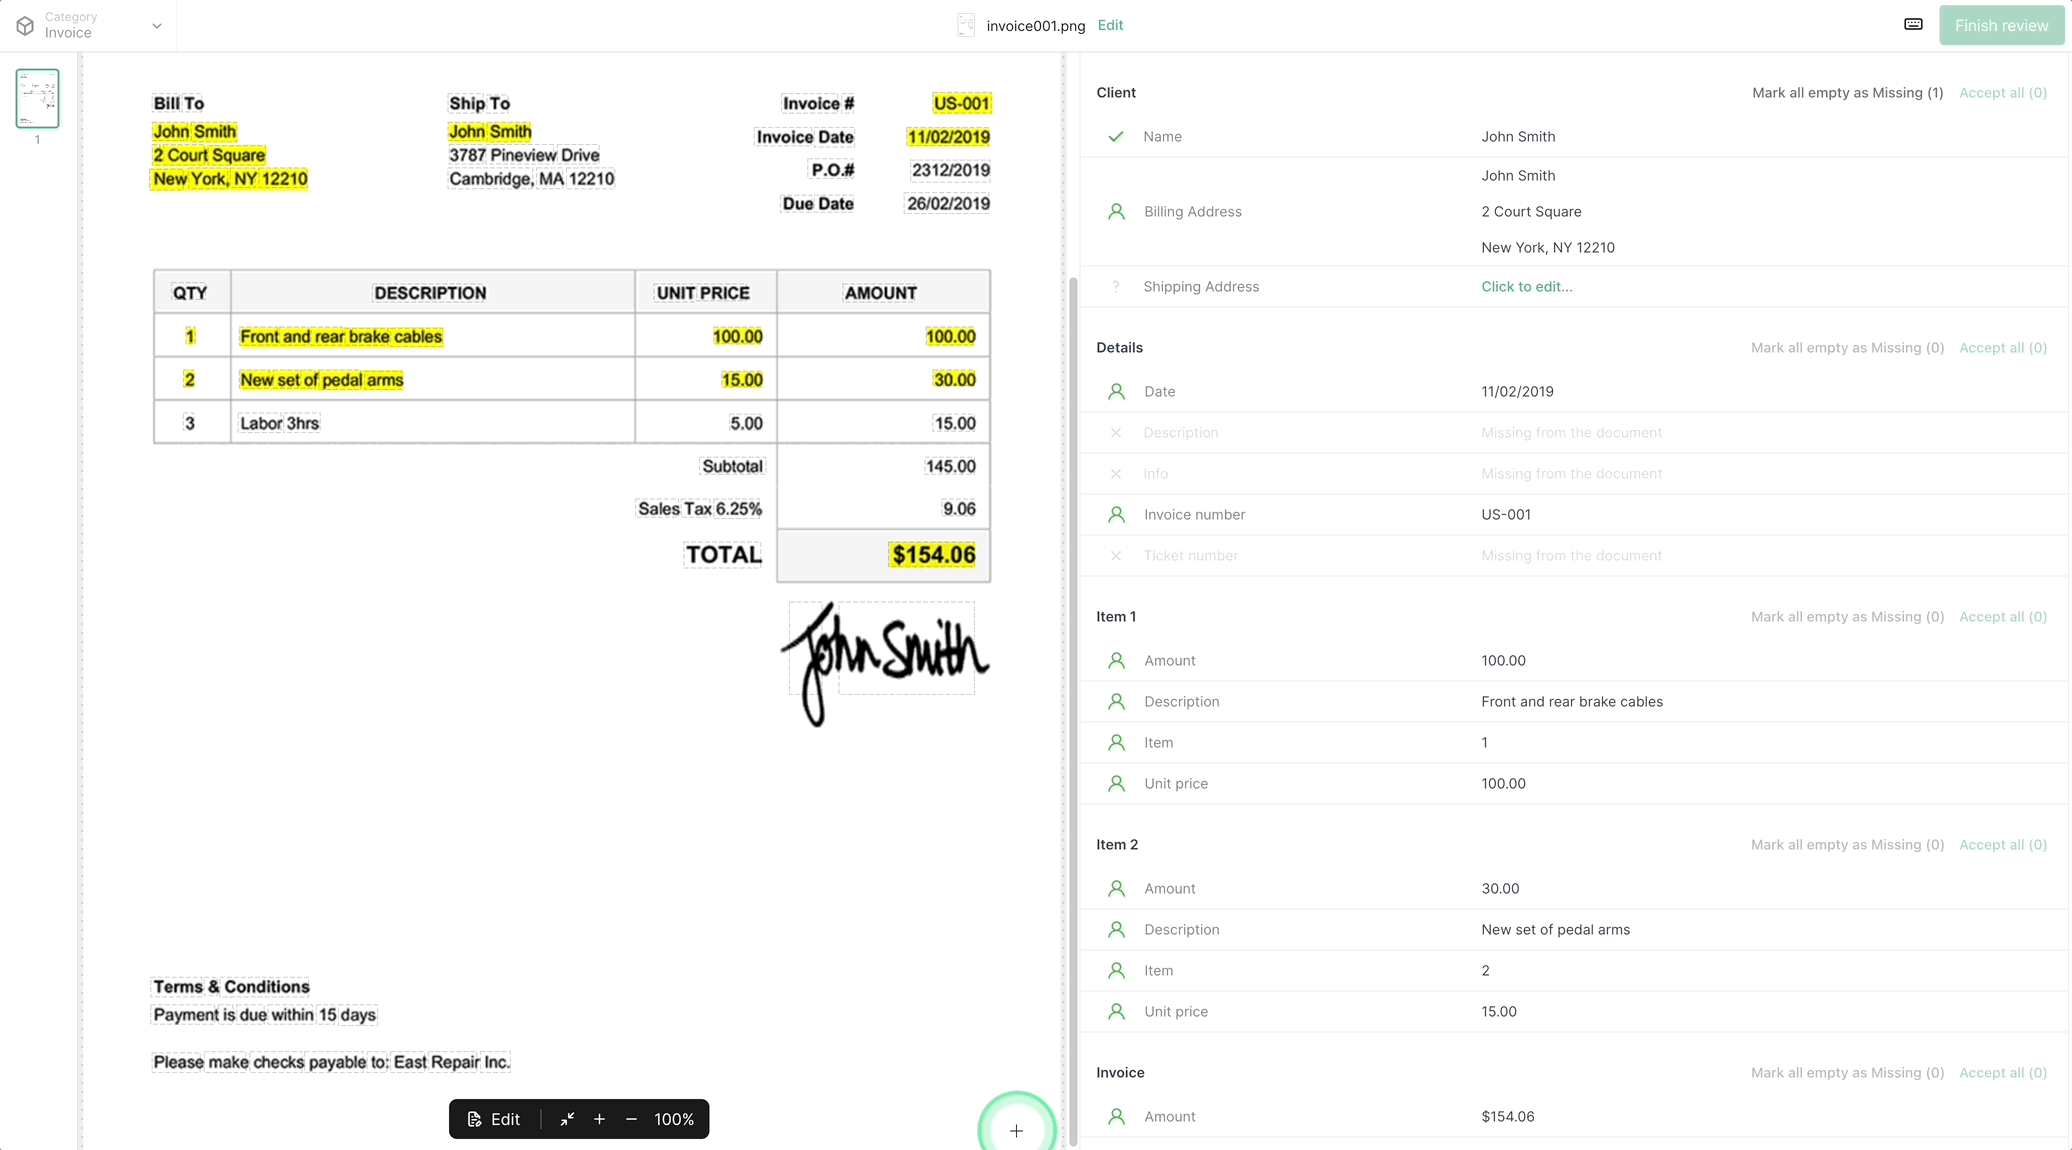
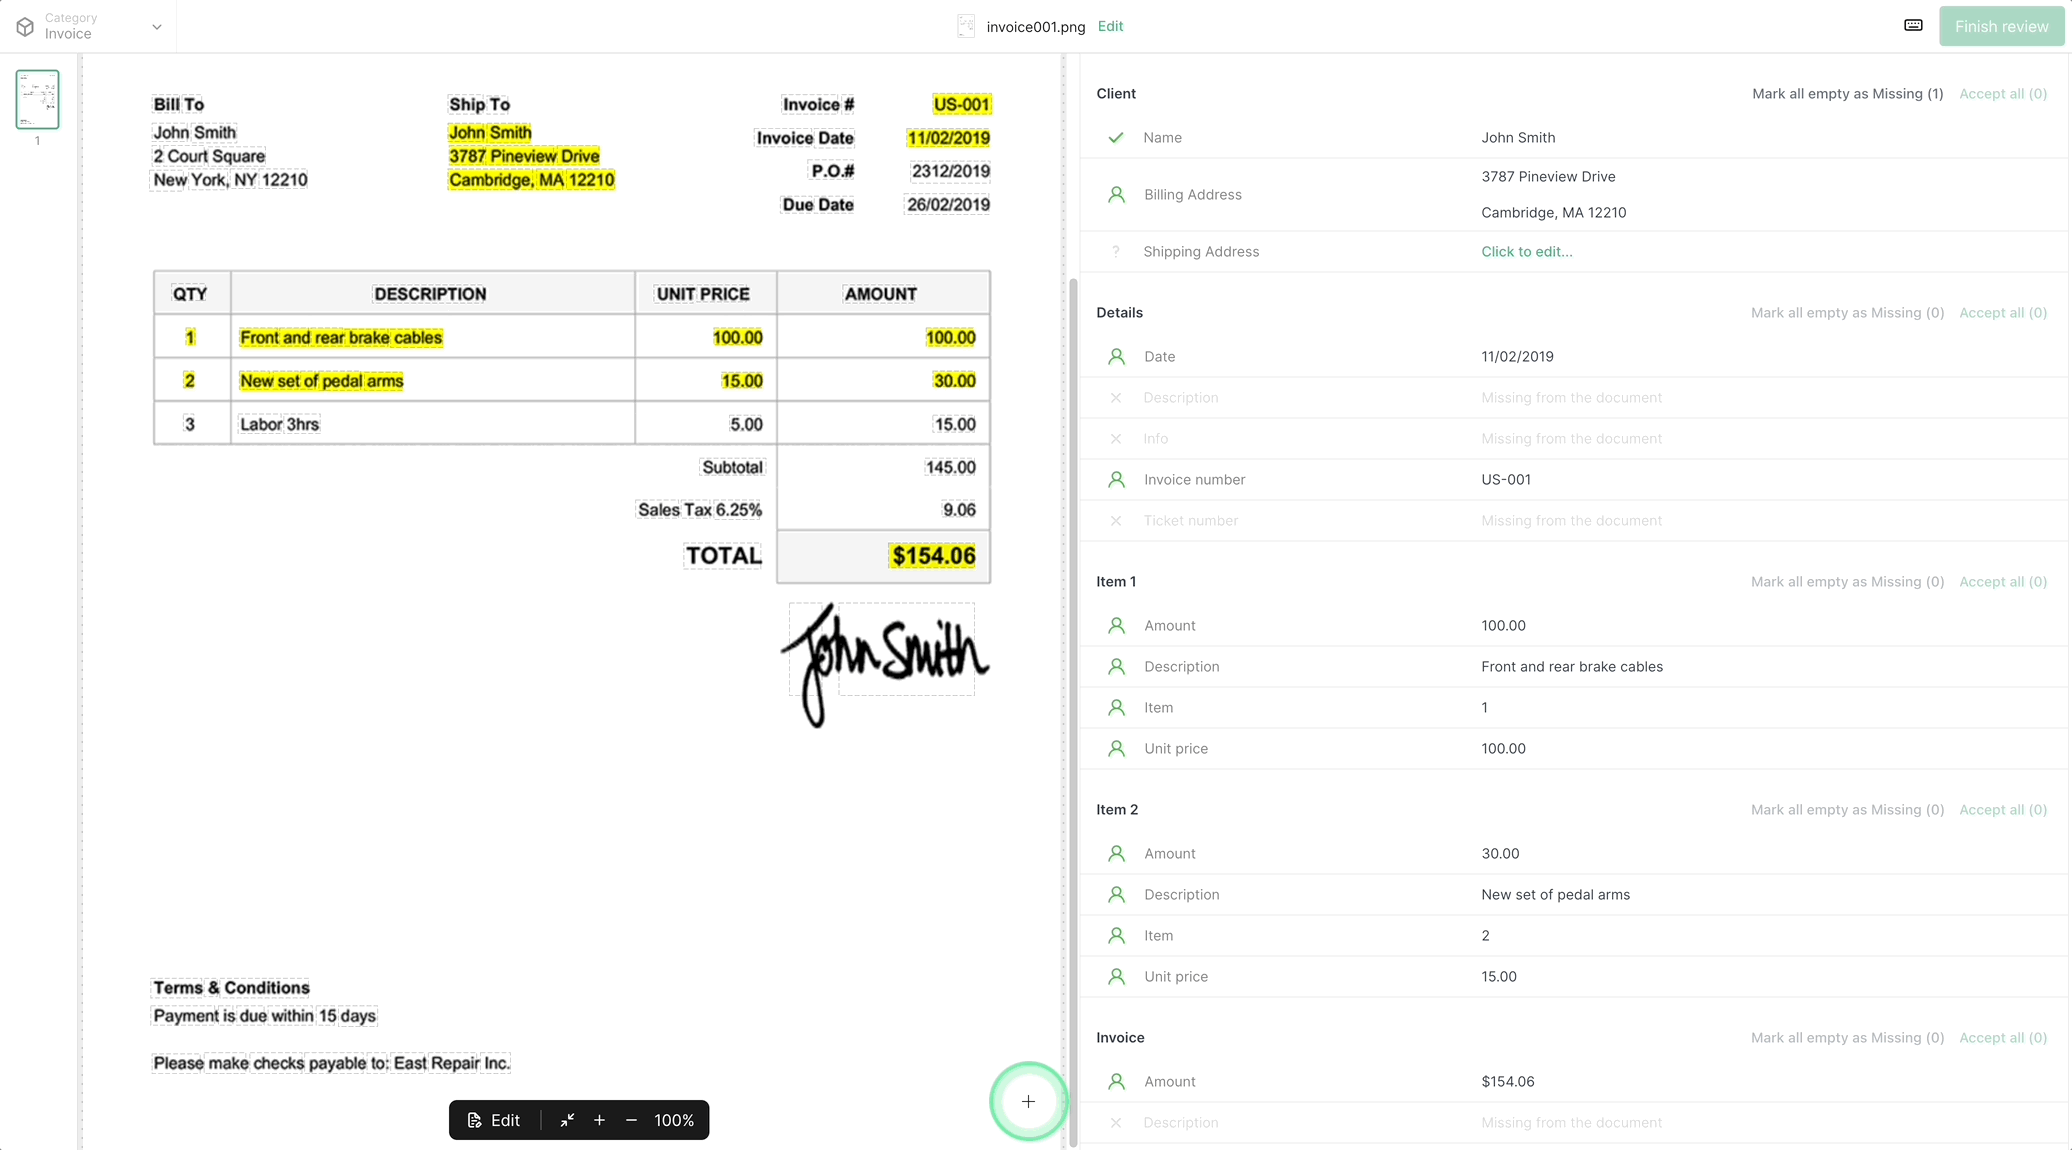
Accept#
If the data was correctly extracted by the AI, you will be able to “accept” it, as shown in the clip below.
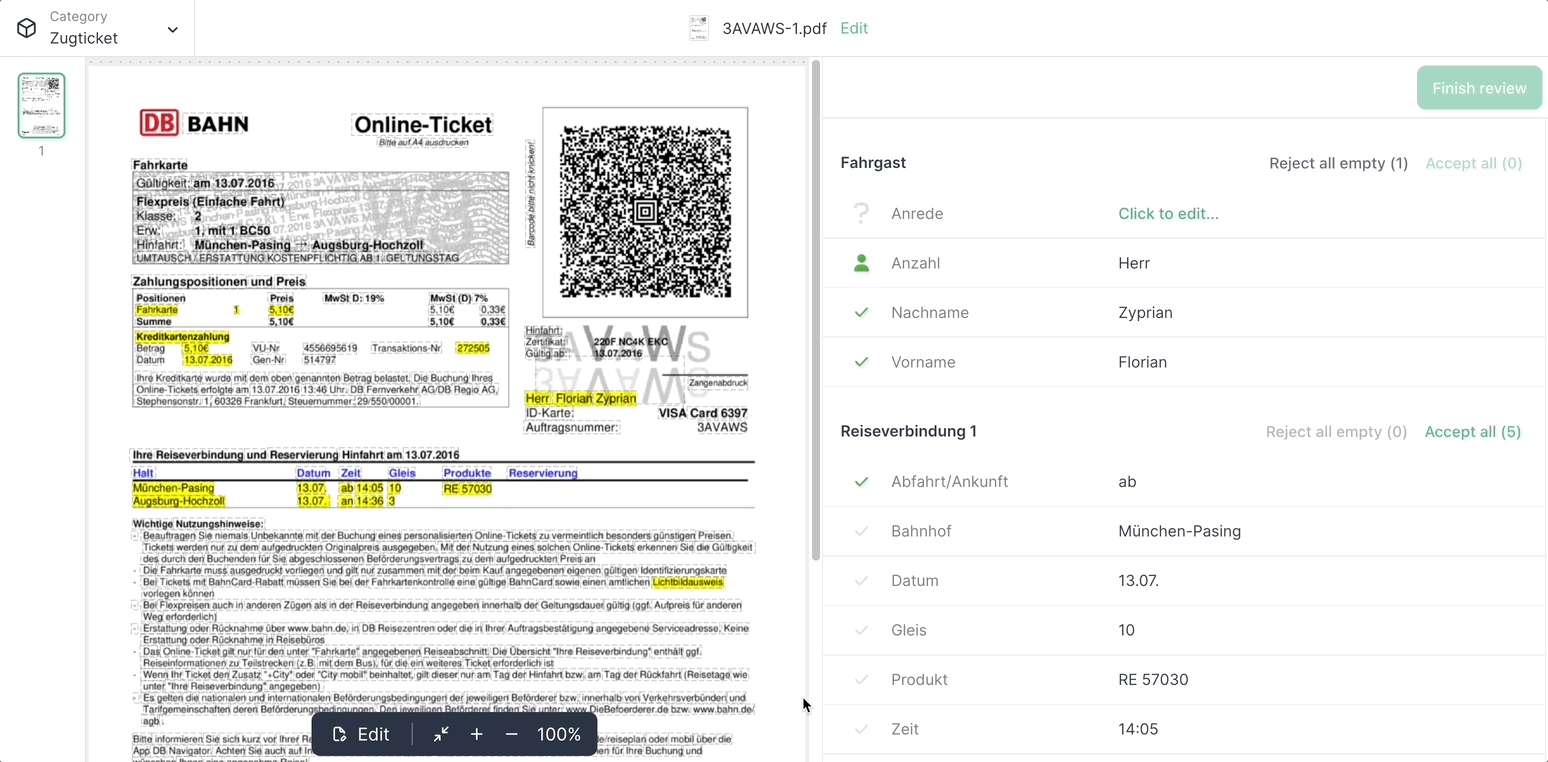
This option will be available only when hovering over the data that has not been revised yet.
If an Annotation is found multiple times for the same Label, and such Label is not intended to appear more than once in the same Annotation Set, these results will be conveniently grouped. To view and accept these results, simply click on the respective Label name for the list of Annotations to be shown.
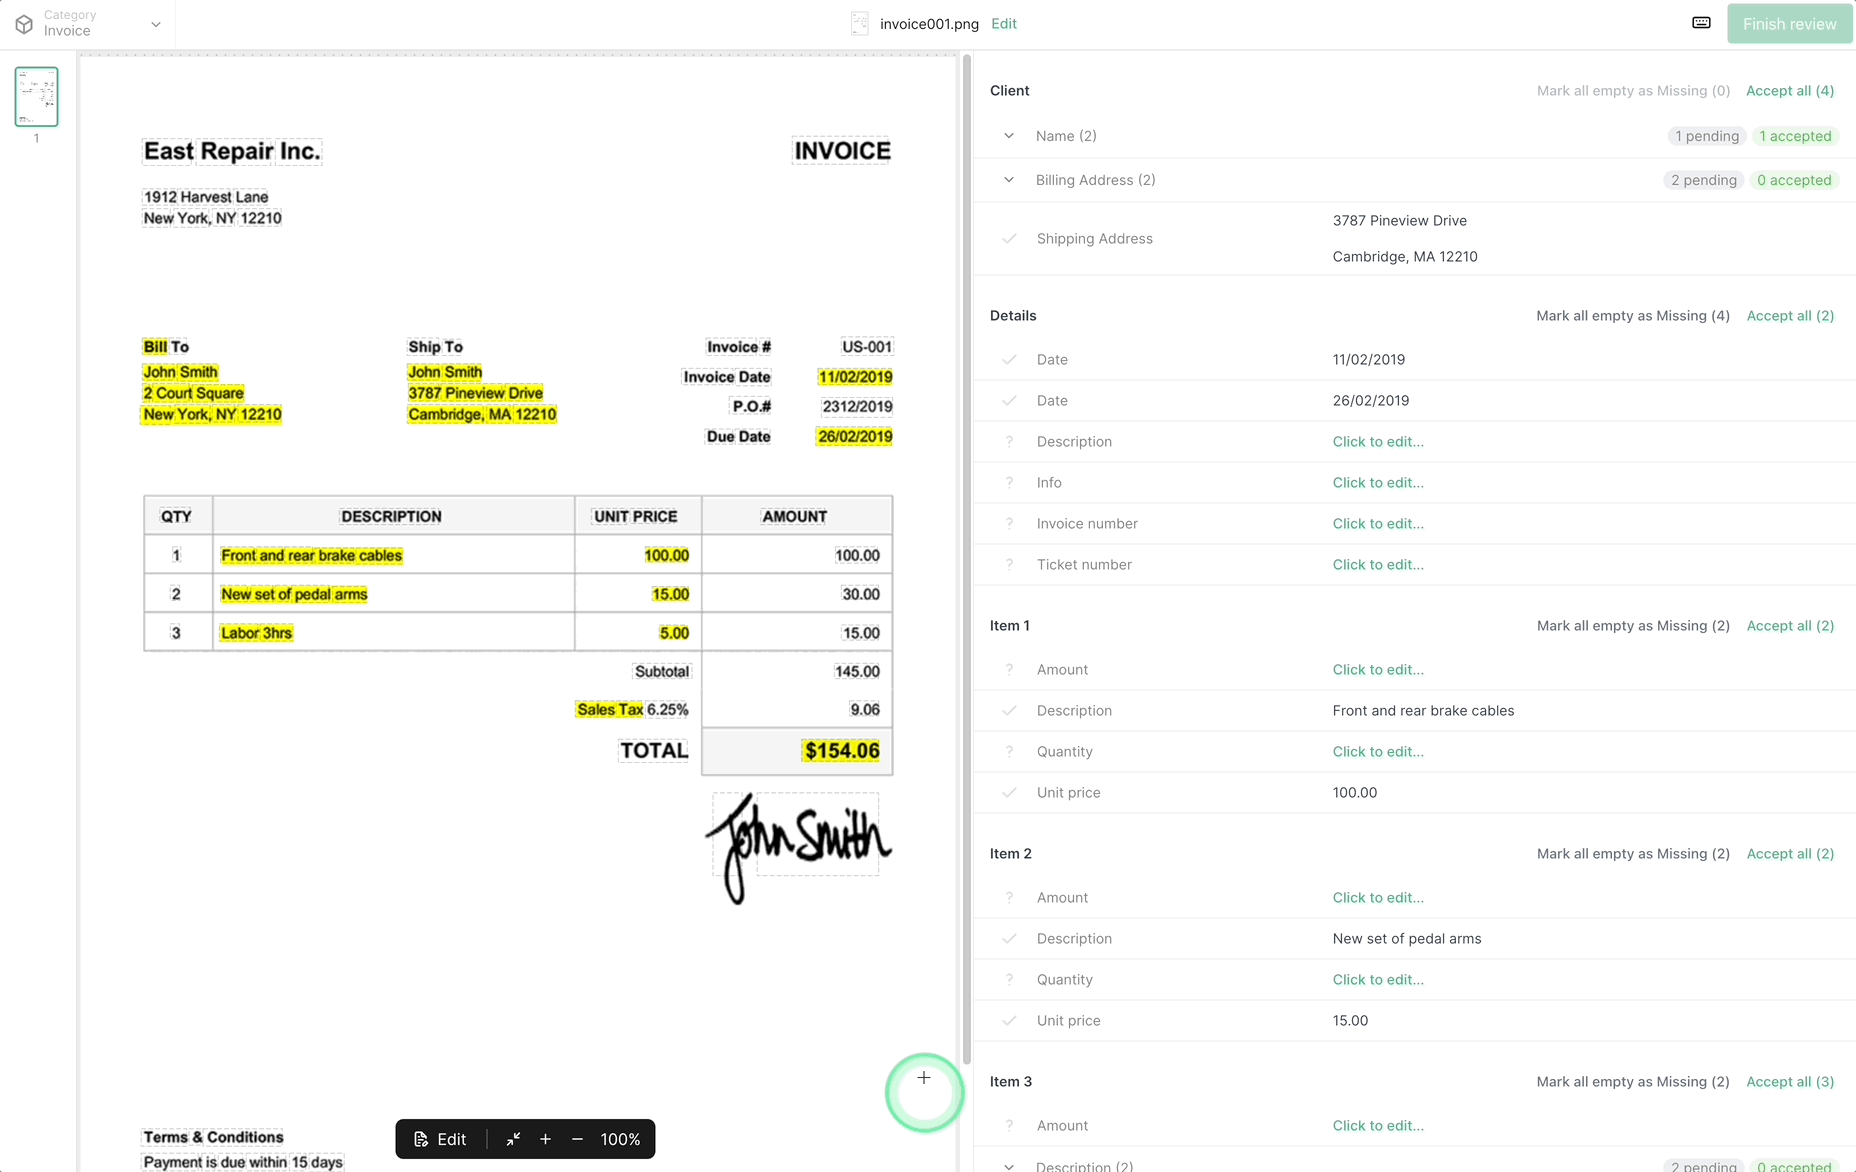
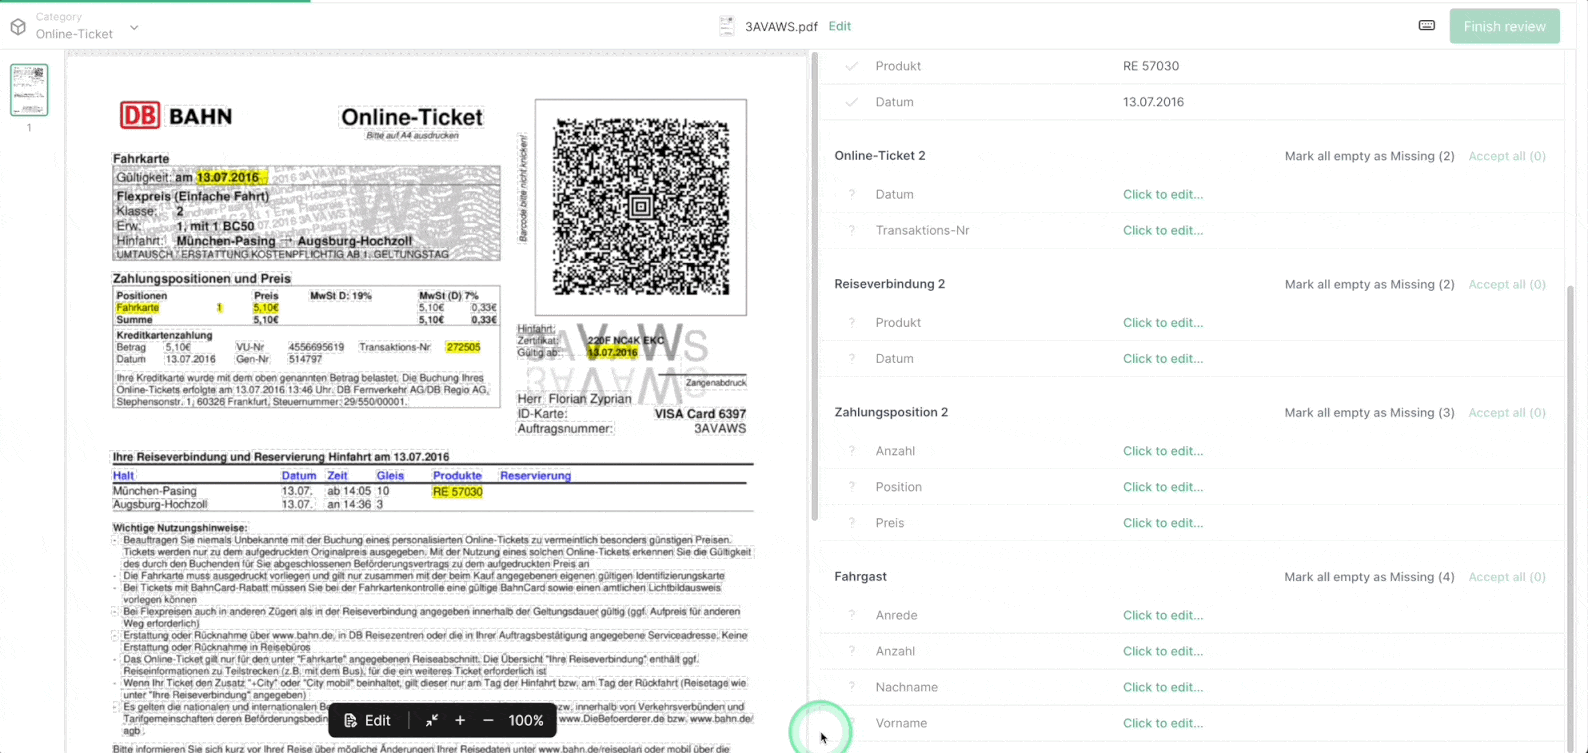
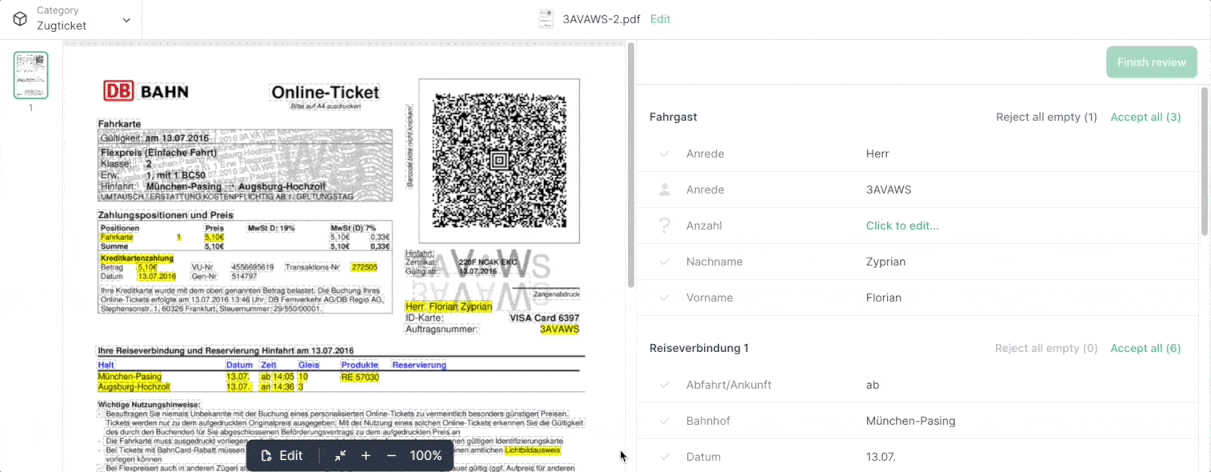
Accept all extracted data in an Annotation Set#
You can also accept all the extracted data that has not yet been revised within a specific Annotation Set, instead of accepting one by one.
To know exactly what rows will be accepted, you just need to hover over the “Accept all” button, which will only be available if there is unrevised data in that Annotation Set.
Decline#
Contrary to accepting an Annotation, if the data extracted by the AI or created manually is not correct you have the option to “decline” it, as shown in the clip below.
This action will delete the existing Annotation, leaving only the unfilled Label.
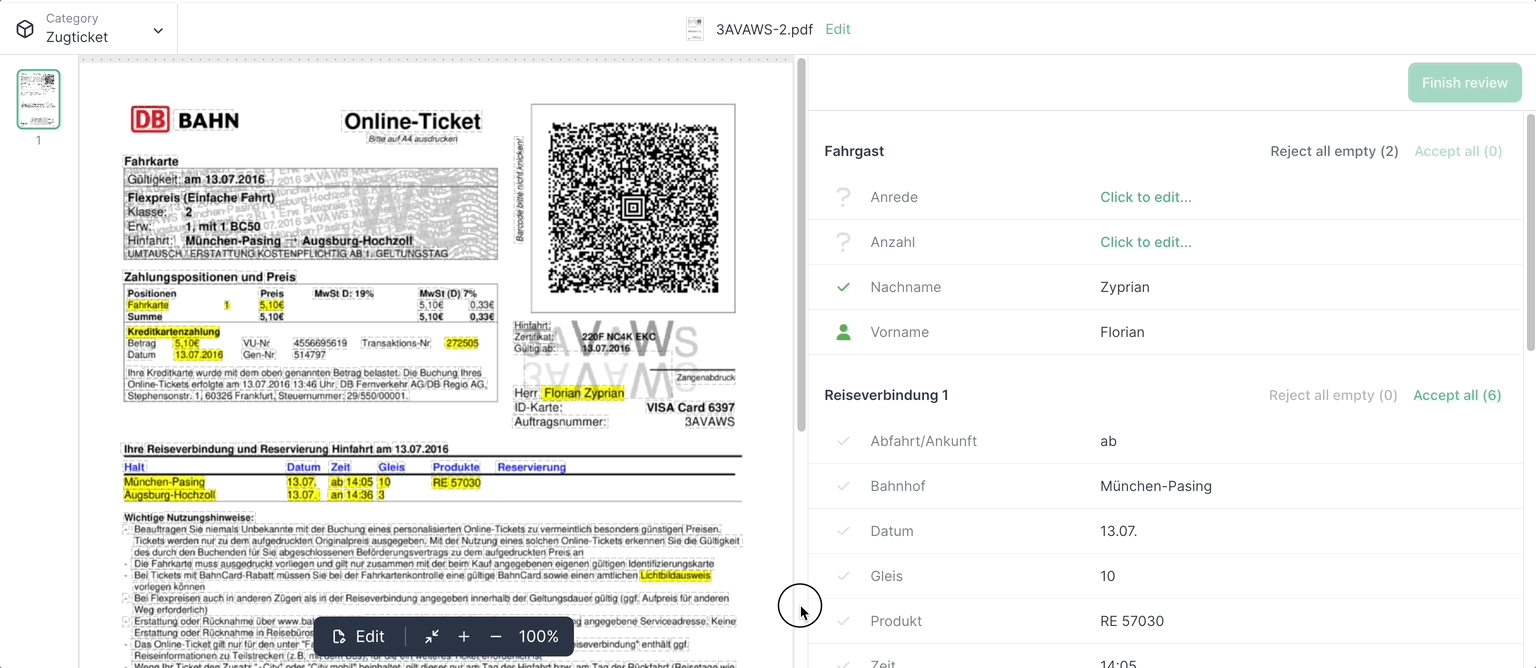
Mark as Missing#
You might encounter the following scenarios when you would like to mark data as missing:
If there was no data extracted for a defined Label.
If there was data extracted, but it is not correct, and there is no text in the Document that belongs to that specific Label.

As shown in the previous video, this option will only be available when hovering over an unfilled Label. Once an Annotation is marked as Missing, it won’t be editable, unless you restore it to the previous state by clicking the corresponding button.

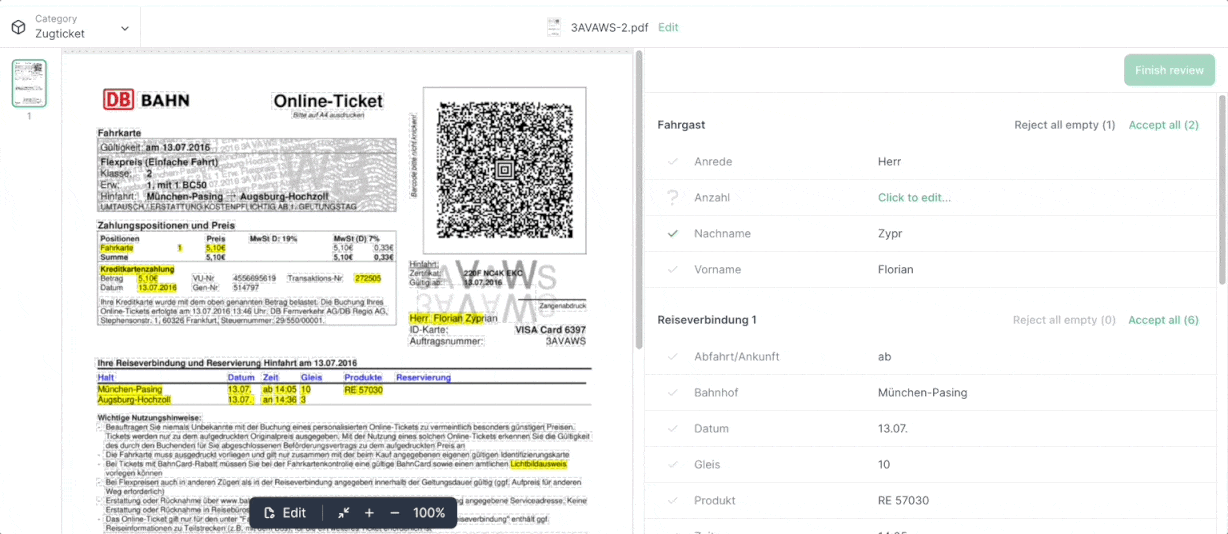
Mark all unfilled rows in an Annotation Set as Missing#
If there are many Labels in a Label Set which do not have any data extracted, it is possible to mark all of them as missing at once, as shown in the clip below:
As with the “Accept all” button, mentioned previously, this button will also only be enabled if empty Labels are remaining.
Edit and correct AI results#
If specific data exists in the Document but was not extracted correctly, you will be able to edit it to make sure its value is the expected one. The edit mode gets enabled when you click on this data or the area where this data should appear.
You can select new text from the Document Page, either by creating a bounding box around the data you want to add or by clicking on the specific data, editing the data manually, and even deleting (using the backspace key) the content if you want to completely replace it.
When editing Annotations that have multiple lines, you can delete the individual lines and the others will remain, as shown in the below example:
However, when selecting new data from the Document Page, the entire Annotation will be replaced, and not the single line.
It is also possible to create a new Annotation when it was not found.

When a Label appears multiple times inside the same Annotation Set (group of extracted data within a specific Document), and the extracted text is entirely deleted for that Label, that specific row will be removed from the list, while the others remain.
Add new data manually#
If some data was not extracted by the AI, you can manually create it by selecting the text from the Document Page, and choosing the corresponding Annotation Set (group of extracted data within a specific Document) and Label that it will belong to.
Please note that, as mentioned previously, the more an Extraction AI is trained the less data will have to be manually added, edited, or marked as missing.
Create Annotation Sets#
As previously mentioned, an Annotation Set is a group of extracted data, and more specifically, it is a Label Set (with its corresponding Labels) extracted for a specific Document (check out our Configuration section for more information on these concepts).
It is only possible to create new Annotation Sets when a Label Set is set up to allow multiple of these groups of data, and you can find detailed information on how to do this in the following guide.
Change Annotation Sets#
If there’s an Annotation but under an incorrect Annotation Set, it’s possible to just change the Annotation Set it belongs to, instead of having to delete it and create a new one again.
To do that, the Annotation should be selected on the list and a popup for editing will appear next to the Annotation box in the document.
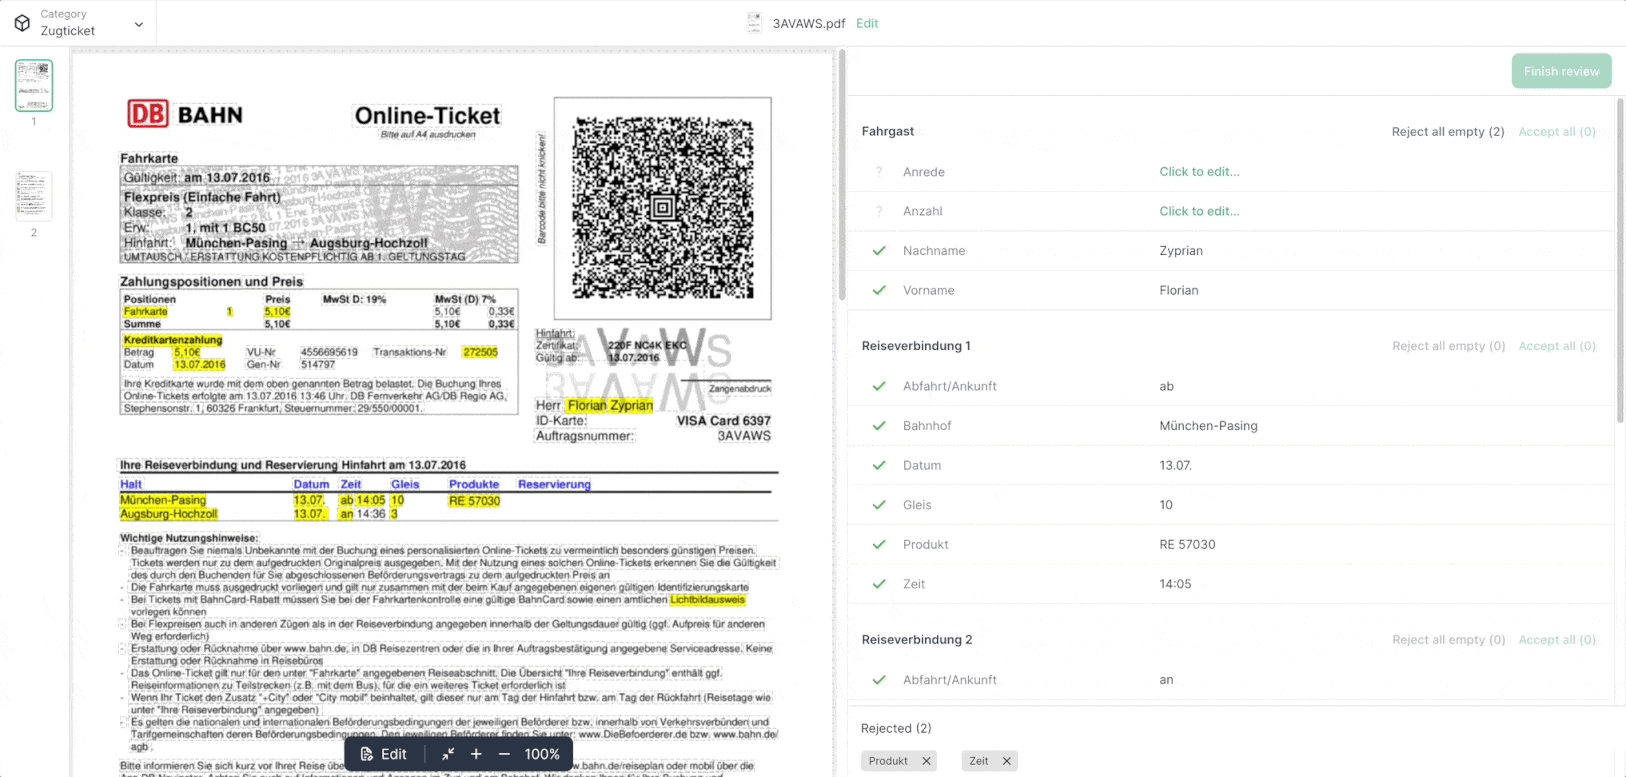
Filter Annotation Sets#
For a quicker review, it’s possible to filter the annotations by those that need to be approved or rejected, those that are already accepted and those that are missing.