Multiple Annotation Sets#
In this tutorial, we will extract table-like structures. Here, it is important that we teach the AI to group Labels. We use line items in invoices as an example.
Why do I need Label Sets#
We will showcase the concept of Label Sets in this tutorial. Apart from an invoice which can have multiple Line Items think of a insurance contract. There can be multiple People who have a first name, last name, birth date in one Document. The Label Set first names defines the concept Person and the option has multiple Annotation Sets defines that you expect to find zero to many People in one contract. The Label Set Person can therefore have multiple Annotation Set which refer to the People mentioned in the Document.
Add a Project#
We use the same Project as in the first tutorial. If you want to create a new one, you can check there again how to create a Project.
Add Labels#
Click HOME > Labels > +Add and add your Labels there. In our example these are: “Quantity”, “Description”, “Unit price”, “Subtotal” and “VAT code”.
Creating Label Sets#
A Label Set is a group of Labels that are logically related to each other. Click HOME > Label Sets > +Add to create a new Label Set. Name your Label Set (here: “Line Item”). Select the associated project (here: “Receipts”). Check the box “Has multiple Annotation Sets”. Then click “Save and continue editing” to get to the next step. Here you can add the Labels you just created to the Label Set using the arrow keys. Click on “Save” to save the Label Set.
Use the multi Label Set option when creating the Label Set.
Go to your Label Set and check the box to allow “The Label Set can be found multiple times per Document.”

Create training data#
Annotation Sets are groups of related information in a Document. In our example, the first Annotation Set contains all information of the first product, i.e. the top line or the first item of the receipt.
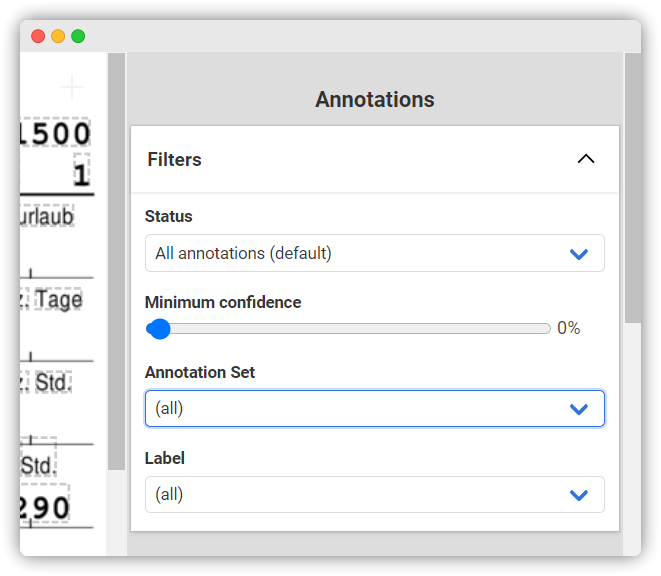
To Label the first Annotation Set, we create an Annotation that belongs to the first Annotation Set. After clicking on the text in the Document, we can define the properties of the Annotation in the Annotation bar on the right side using two tabs. In the upper tab, we select the Label Set that corresponds to the Annotation Set and in the lower tab, we select the Label that should be assigned to the entity.
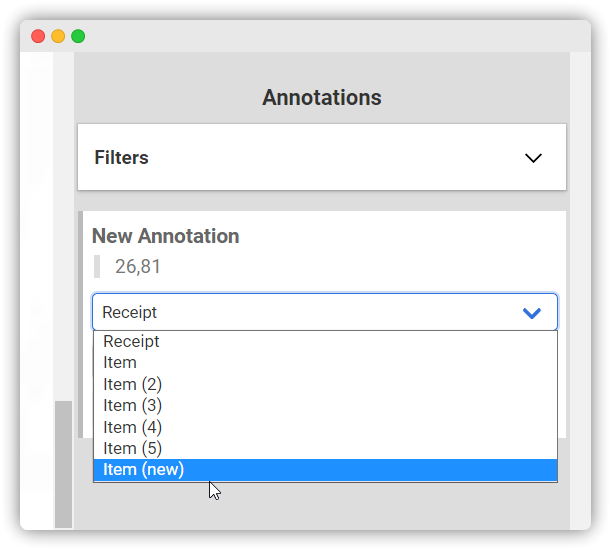
We select “Item (New)” at the top and “Number” at the bottom. We then Label the rest of the Annotation Set, with the first Annotation Set now being displayed as “Item”. We repeat this for the next Annotation Set. They will then be listed in the tab numbered from top to bottom.
To create an additional Annotation Set, select “Item (New)”. We repeat this process for all training Documents. Create your training data according to our example. Due to the diversity of the application area, differences may occur. For example, Annotation Set do not always have to correspond to rows.
Reviewing the training data#
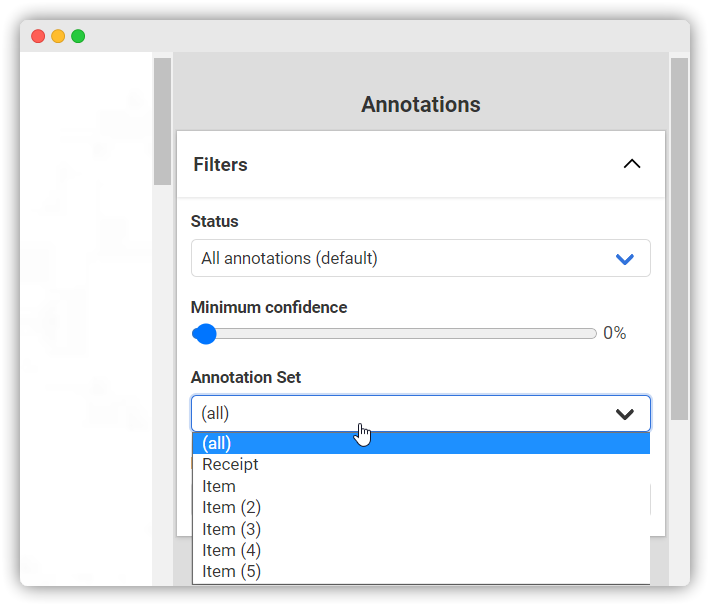
You can verify correct Labels as they are displayed above the Annotations. However, it is equally important for the learning success of the AI to verify that the Labels are assigned to the correct Annotation Sets. To do this, you can do the following: In the upper right corner of the Annotation bar, select the first Annotation Set in the “Annotation Set” tab under Filter (here: “Item”).
Now only the Labels of the first Annotation Set should be visible. Most of the time you can see at a glance if they are correct (Here: If all Labels are in one row). If you see an error, you can use “Edit” in the Annotation bar to fix it. (Tip: You should also use this method when checking the results of the AI).
